Posts

Showing posts with the label Unity

Unity Tutorial 07 (Semester 2)

Image
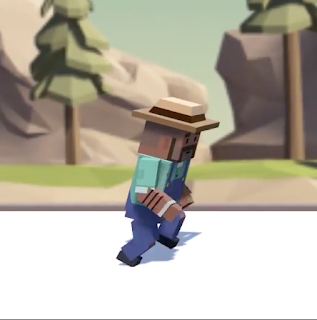
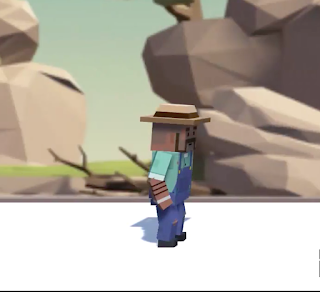
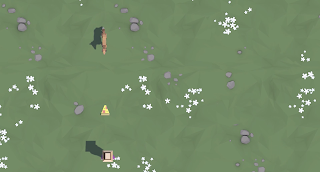
  Image from the tutorial This week I did my final Ruby tutorial for the semester and I have to say it was a pretty good feeling. Up until this week my game has had no audio so this week I had to add some in. This week I learned about audio clips, audio listener and audio source. Audio clips are assets that you can import from an audio file such as MP3 and wav. Audio listener is a component that tells you where the listener is in the scene which is placed on the camera. Audio source is a component that allows you to play an audio clip where the GameObject is. The first thing I had to do was add in some background music. To do this I had to create a new GameObject called BackgroundMusic and add audio source to it. I then had to add in an audio clip called 2D MUSIC LOOP so that the music would play from the beginning to the end. I then had to add in the spatial blend slider and make it go all the way to 2D so that my music could be heard everywhere. I then had to add a one shot sound...

Unity Tutorial 06 (Semester 2)

Image
  Image from the tutorial For this weeks tutorial I had to add a user interface to my game so that I could see Ruby's health on screen. The first thing I had to do was create a UI canvas in my hierarchy. After I did this a new GameObject called EventSystem was added to my scene. This GameObject is a component that dealt with interactions with the UI such as a mouse click. I then had to select this GameObject in my inspector. The GameObject had something called a rect transform component instead of a transform component. The difference between a transform component and a rect transform component is that it has additional UI data and it can be in three different modes: Overlay which makes Unity display your health on screen at all times, camera which aligns the UI with your camera and world space which draws a plane anywhere in your world.  I had to keep it in overlay so I could see Ruby's health all the time. I then had to use the canvas scaler component and set it to constant ...

Unity Tutorial 05 (Semester 2)

Image
Image from the tutorial Throughout these tutorials I have been using a static camera within a single screen so this week I had learn how to control my camera automatically without needing to use code. This was so my camera would always follow Ruby. To do this first I had to open my packages folder and install my cinemachine package. I then had to add a cinemachine 2D camera to my scene creating a GameObject called CM vcam1. I then learned about the two different camera modes in games. The camera modes are perspective and orthographic. Perspective mode is where the lines going away from the camera converge to a point which makes objects appear smaller as they get further away from the camera. Orthographic mode is when parallel lines stay parallel. The instructions said to leave the camera in orthographic mode because since it is a 2D game things shouldn't get smaller in the distance so that's what I did. I then had to set my camera to 50 units of the world in it's height so ...

Unity Tutorial 04 (Semester 2)

Image
  Image from the tutorial For this weeks tutorial I continued on with Ruby's Adventure once again. At this point I had my world created with objects, a character and enemies but this week I had to add animation to my character. The first thing I had to do was go into prefab mode for my robot prefab and add a new component called animator component. Afterwards I had to create an animator controller and set it up in my robot animator.  I then had to enable my controller in my controller setting. After this I had to actually create the animations. To do this I had to open my animation window and create an animation called RobotLeft.anim.  I then had to change my sprites by bringing them into my animation window. I then had to get my robot moving by creating a new animation clip called Right_Run and adding a flip property to my sprite renderer. I then had to build a controller in my animation window. My animator included both layers and parameters on the left side and an anim...

Unity Tutorial 03 (Semester 2)

Image
(Image of enemy from the tutorial) For this weeks Unity tutorial I continued on with my Ruby's Adventure tutorials that I have been doing since the beginning of the semester. At this point I had my world set up but this week I had to make it possible for Ruby to collect items such as health packs. First off I had to give Ruby some health. To do this I had to add a health variable to my script. After this I had to add a new variable called a function in order to change my characters health. I had to add the following code: void ChangeHealth(int amount), currentHealth = Mathf.Clamp(currentHealth + amount, 0, maxHealth); Debug.Log(currentHealth + "/" + maxHealth); After I did this I was able to see Ruby's health in the console window. I then had to make it possible for Ruby to collect health. To do this I had to find the CollectibleHealth object in my assets folder and add it to my scene. I then had to adjust the PPU value to the right size. I then had to add a box colli...

Unity Tutorial 02 (Semester 2)

Image
  Image from the tutorial For this weeks Unity tutorial I had to continue on from last weeks one where we set up Ruby's Adventure. This week I had to decorate the world I set up last week. First I had to select the metalcube object from my assets folder and add it to my scene however when I did this Ruby was unable to collide with my GameObject so obviously I had to fix this. To do this I had to go into draw a GameObject using graphic in my project settings. I then had to find transparency sort mode and change my default settings to custom axis. I then had to set my transparency sort axis coordinates to x=0, y=1, and z=0. After I did this Ruby was being drawn in front of the box too early so of course I had to fix this too using the sprite renderer. First I had to select the Ruby GameObject in my hierarchy and find its sprite renderer component in my inspector. Then I had to change my sprite sort point field from center to pivot so that it wouldn't be set in the center anymore....

Unity Tutorial 01 (Semester 2)

Image
  (Image of Ruby from the tutorial) For this weeks tutorial I had to make a 2D game instead of a 3D game like in semester 1. I had to do this following tutorials for a game called Ruby's Adventure: 2D Beginner Project. I previously have had experience making a 2D game in my plc on a website called Flowlab however as I had graduated my plc 2 years ago it felt like it was all new to me especially since I didn't use Unity the first time round. For this tutorial I had to update my Unity Software to a different version then what I currently had for semester 1 so that I could create a 2D game. After this I started adding in my main character (Ruby) and then I had to make her move. To do this I had to create my first script just like in semester 1. To add my main character I had to download an image of her from the tutorial materials folder (see image above). I then had to add her to my sprites folder. I then had to make my Ruby sprite into a GameObject. I had to put this sprite into ...

Unity Tutorial 09

Image
Image from the tutorial For this weeks tutorial we had the choice of continuing on with the next tutorial after last weeks or going back and doing previous tutorials that will help us with our final game. As I am busy with my final game and am still yet to end my game with a "you win" or "game over" message I decided to go back and do the tutorial on how to trigger a game over message. This is one of the collision decisions tutorials which I have also gone back over as my game involves your player colliding with boxes and destroying them. Doing the tutorial this time around was easier than the first time as I had already done it before so I just had to repeat what I did last time. This tutorial has helped me with my collision decisions in my game and I found triggering my game over message easy during the tutorial however I am still struggling with it in my actual game as my game has a different setting and I plan on ending my game when my player falls off the road ...

Unity Tutorial 07

Image
  Image from the tutorial For this weeks tutorial I had to learn how to make the camera follow around my player. My player was a sphere on an island and I had to have the sphere rolling around the island without falling off and I had to have the sphere move in the direction of the camera.  First off I had to make a new GameObject called the focal point and put it in the centre off the scene. I then had to make the camera a child object of the focal point and reset the focal point position to (0,0,0) so that it would change whenever the camera rotated. I then had to make a new script called RotateCamera and attach it to the focal point.  I then had to go into my RotateCamera script and add a new public float called RotationSpeed; I also had to go into my Update method and a new float called horizontalInput = Input.GetAxis("Horizontal"); I also had to add transform.Rotate(Vector3.up, horizontalInput * rotationSpeed * Time.deltaTime); and then set the rotation speed to 50. I...

Unity Tutorial 06

Image
Image from the tutorial For this weeks Unity tutorial I had to continue on from last weeks one. This week I had to learn how to make the player going from a running state when using the running controls, a jumping state when using the jump controls and a death state when the player hit a barrier. To do this I had to use an animation controller.  Animation controller The animation controller is what is used to control the players animations which is pretty self explanatory. The animation controller controlled each state that the player is in so I needed to use it to get him into any one of these three states when needed. When I clicked on walk or run the players animation character walked or ran however when I clicked walk_static or run_static the animation character only ran or walked on the spot. I then had to edit the players condition. I had to change the speed from 0 in order to get him to move. I then had to make the player start off by running. To do this I had to go to the p...

Unity Tutorial 05

Image
Image from the tutorial For this weeks Unity tutorial I had to continue on from last weeks in which I made the character in the image above move along the screen and jump over obstacles when the spacebar is pressed however once the character gets to a certain point the background disappears so I had to make the background move along with the character. I wasn't able to duplicate the background images because eventually the image slides would've run out so instead I reset my background and added two background slides right beside each other and created a new script called RepeatBackground.cs and added it to my Background Object folder. I then had to add a private Vector3 variable to my background script and call it startPos; I then had to go to my Start method and set the startPos variable to transform.position; I then had to add an if-statement in my Update method called if(transform.position.x < startPos.x-50). I then had to add transform.position = startPos; to my if-state...

Unity Tutorial 04

Image
  Image from the tutorial For this weeks Unity tutorial I had to continue on from last weeks lesson where we created the game in which you fire food at animals. This time we learned how to make an animal spawn automatically every couple of seconds instead of them spawning when a key is pressed. I also learned how to make the food and animal disappear from the scene when the food hits the animal. For the first time I had to create a new method called SpawnRandomAnimal () {. The type of method is called a void. I then had to copy and paste my code from my If-statement and paste it into my new void and remove the code from my if-statement. Then I had to add SpawnRandomAnimal (); to my If-statement. To make my animals spawn on a timer instead of spawning when a key is pressed I had to add InvokeRepeating("SpawnRandomAnimal", startDelay, spawnInterval); into my start method. I then had to remove my If-statement so that I no longer had to press S to spawn animals. I then had to two...

Unity Tutorial 03

Image
  Image from the tutorial For this weeks Unity tutorial I had to do something very different from the last one where I learned how to control a car and destroy crates. This week the tutorial taught us how to create a game in which you control a farmer and you have to fire pizza slices at incoming animals in order to feed them. To get started I had to follow the same process as the first tutorials and create an empty prototype 2 folder and download the prototype 2 starter files. I had to a human, 1 food and 3 animals to the hierarchy. I dragged in a moose, a fox and a doe just like in the video.  I also had to adjust the XYZ scale so I could see the food clearly from above.  The starting process was very much the same as the one in the first Unity tutorial I did only it is a completely different setting which I found very interesting. I would've assumed that the starting processes would be different depending on your game. I had to create a scripts folder in my assets fold...

Unity Tutorial 02

Image
  Image of the vehicle from the tutorial For this weeks task I had to continue on with the unity tutorials from last week. This week I learned how to control the vehicle and make it move from left to right rather than the vehicle just going straight and driving off the end of the path. First I had to open my PlayerController script and add a public float variable called a turnSpeed. I gave it a speed of 5.0f just like in the tutorial.  I also had to add a new vector3 in the transform.translate section of my script. Earlier in the tutorials I had to add vector3.forward to my transform.translate section but now to make the vehicle move left and right I had to add vector3.right and vector3.left so now the vehicle can move left, right and forward. I then had to multiply the Time.deltaTime by the turnSpeed variable so that so then the vehicle could turn left and right overtime instead of once every frame. After I did this we then had to go into the input manager in project settings...

Unity Tutorial 01

Image
Image of the vehicle I chose for the Unity tutorial. For this weeks task we had to look at a series of Unity tutorials that we will be using for our game that we will be making for this module. For lesson 1 we learned how to set up Unity and our game. I also learned how stressful it is to use Unity without a mouse. First of I had to download files and put them in a folder called course with code and then open that folder in Unity. I then had to add a vehicle from the hierarchy menu to my game. I chose a tank. I had to place the tank on the road that came with the tutorial sample. I then had to place an object from the hierarchy menu onto the road in front of the tank. I chose a box. After I did all this I learned how to move the camera around and I had to position the camera behind the vehicle. This was the most difficult part of the first lesson. After I did all this I had to change the layout of my screen. I moved the game view on my screen beneath the scene view so now my game is in...