Unity Tutorial 01

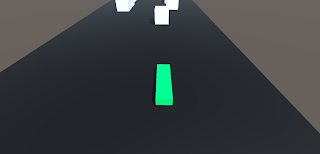
Image of the vehicle I chose for the Unity tutorial.
For this weeks task we had to look at a series of Unity tutorials that we will be using for our game that we will be making for this module. For lesson 1 we learned how to set up Unity and our game. I also learned how stressful it is to use Unity without a mouse. First of I had to download files and put them in a folder called course with code and then open that folder in Unity. I then had to add a vehicle from the hierarchy menu to my game. I chose a tank. I had to place the tank on the road that came with the tutorial sample. I then had to place an object from the hierarchy menu onto the road in front of the tank. I chose a box. After I did all this I learned how to move the camera around and I had to position the camera behind the vehicle. This was the most difficult part of the first lesson. After I did all this I had to change the layout of my screen. I moved the game view on my screen beneath the scene view so now my game is in split screen. I also gave my screen a tall layout. After this I was ready to move onto lesson 2. Lesson 2 is where we learned how to move our vehicle. We had to create a scripts folder in order to do this and name it PlayerController. We had to drag the script into the vehicle object and add the vehicle object as a component. After this we had to open up the script in the visual studio in order to update it and add the comment "Move the vehicle forward". I then had to give the vehicle a forward motion. To do this I had to type transform.tr into my script and then select translate from the autocomplete menu. We had to select the vehicle in our hierarchy menu and use the Z axis in our transform menu to move the vehicle. I also had to add (0,0,1); to my code in order to make my vehicle only move left and right. I then had to customise the vehicle's speed. I did this using a code called the vector3. I had to type vector3.forward into my transform menu and Time.deltaTime in order to make this possible. I also had to add a number so I could make the vehicle move that many metres a second. After this I had to add a new component to my vehicle and object called RigidBody. I had to do this so that when my vehicle hit the object it knocks the object off the road which is what I was aiming to do. I also had to edit the mass and kilogram of the vehicle and object so that they would both weigh more. After this I added more obstacles to make the game more fun and interesting. I did this by dragging my obstacle to the bottom of the list in the hierarchy and pressing Ctrl/Cmd+D. I then moved them around to space them out using the Z axis. I then learned how to do high speed chases. First I had to add a speed variable to my vehicle. To do this I had to add float to my public class and add speed = 5.0f. I then had to replace the speed value with a speed variable. I then had to add a new script called FollowPlayer to the camera. This was so the camera could follow the player as it moved. I had to add it as a component. I then added an offset to my camera position. To do this I had to add a new Vector3 with the values of 0, 5 and -7. During these tutorials I learned the basics of using Unity. I found it very challenging at the start but hopefully it will get easier as I go along. I found all the camera work to be very challenging especially without a mouse.

Comments
Post a Comment