Unity Tutorial 04 (Semester 2)
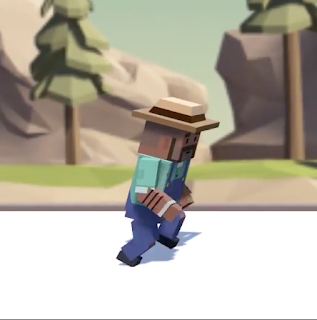
Image from the tutorial
For this weeks tutorial I continued on with Ruby's Adventure once again. At this point I had my world created with objects, a character and enemies but this week I had to add animation to my character. The first thing I had to do was go into prefab mode for my robot prefab and add a new component called animator component. Afterwards I had to create an animator controller and set it up in my robot animator.
I then had to enable my controller in my controller setting. After this I had to actually create the animations. To do this I had to open my animation window and create an animation called RobotLeft.anim. I then had to change my sprites by bringing them into my animation window. I then had to get my robot moving by creating a new animation clip called Right_Run and adding a flip property to my sprite renderer. I then had to build a controller in my animation window. My animator included both layers and parameters on the left side and an animation state machine on the right side. I then had to use something called a blend tree. A blend tree allows you to blend more than one animation depending on your parameter. Before I created my blend tree I had to delete all my animations. After I did this I had to make my parameters move in X and Y directions by going into my parameters tab in my animation window and make them go from -1.0 to 1.0. I then had to name these parameters Move X and Move Y and make them float types. I then had to select my blend tree in my inspector and choose my 2 parameters. I then had to go into my motion section and add 4 motion fields because I wanted to blend 4 animations. I then had to set my left position to X= -0.5, Y= 0, my right position to X= 0.5, Y= 0, my up position to X= 0, Y= 0.5 and my down position to X= 0, Y= -0.5. I then had to add parameters to my animator controller. To do this first I had to go into my EnemyController script and add an animator component to my Start method as well as a SetFloat function. After this my robot was able to move. I then had to set my animation for Ruby. To do this I had to add an animator to my Ruby prefab and add the RubyController Animator to my controller slot. I then had to add a transition to my blend tree called moving and idle. I then had to edit my RubyController script the same way I edited my EnemyController script so that Ruby could move. I have now learned how to give 2D animations to my sprites. Next up I had to create a projectile so that I could make Ruby fix the broken robot I added in the previous lesson. I had to create the projectile in my VFX folder and call it CogBullet. I then had to set my cog to 300 pixels per unit to make it smaller. I then needed to give it a Box Collider2D and RigidBody2D in order to detect collisions. I then had to set the gravity scale of my RigidBody to 0. I then had to create a projectile script and use the physics system. In my physics system I had to add a Rigidbody2D variable to my Start function. I then had to create a function called Launch and add a Vector2 direction as a parameter as well as a float force to make my cog move faster. I then had to create a function called AddForce and add it to my RigidBody. I then had to create an OnCollisionEnter function. I then had to add a prefab to my projectile. I then had to add a public variable to my RubyController script called projectilePrefab and then make it a GameObject. I then had to launch the cog. To do this I needed to use my input class GetKeyDown so I could launch my cog using the C key on the keyboard. To make it possible to launch a cog using a phone I had to use the input class Input.GetButtonDown. I then had to clean up all the errors in my script in order to fix my robot.


Comments
Post a Comment